This information explains how to set up your iHealth pulse oximeter so it automatically sends your results to your MSK care team.
A pulse oximeter is a device you place on your finger. It measures your blood oxygen level (how much oxygen is in your blood) and pulse rate (how fast your heart is beating). These measurements show how well oxygen is getting to different areas of your body.
Your iHealth pulse oximeter records your results in your iHealth account. Linking your iHealth account to your MSK Remote Monitoring app account lets it automatically send your results to your MSK care team. This will help them make decisions about your care while you’re at home.
How to connect your iHealth account to the MSK Remote Monitoring account
If you don’t already have the MSK Remote Monitoring and iHealth MyVitals applications (apps) on your smartphone or tablet, download them now.
- Open the MSK Remote Monitoring app on your smartphone or tablet and log in using your MSK MyChart username and password (see Figure 1).
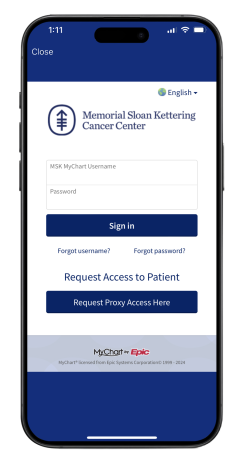
Figure 1. MSK Remote Monitoring app
- Review the authorization screen and select Continue (see Figure 2).
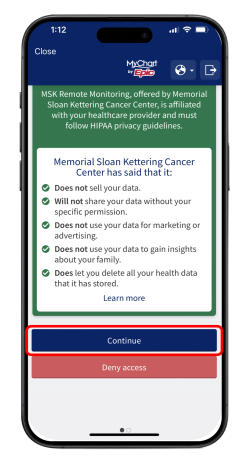
Figure 2. Authorization screen
- Review the data authorization screen and select a time range, then tap “Allow access” (see Figure 3).

Figure 3. Allow access
- You will see the Devices screen. Look for the Pulse Oximeter tile. Select “iHealth” (see Figure 4).
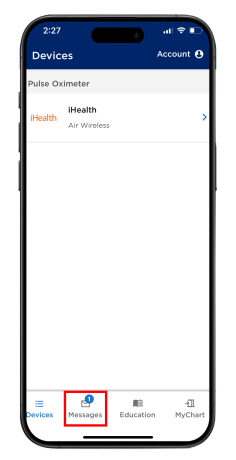
Figure 4. Select device
- Tap the message from “iHealth Pulse Ox Invite” (see Figure 5). Review the patient education resource links. Once you have reviewed. tap the “iHealth” link in the body of the message (see Figure 6).
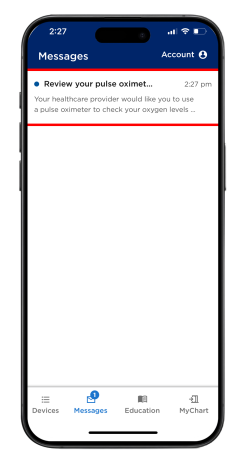
Figure 5. Tap the message to open
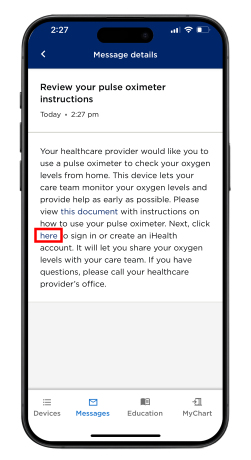
Figure 6. Tap the link in the message
- The link will bring you to the iHealth login page (see Figure 7). This is different from the MSK Remote Monitoring login. Log into your iHealth account or tap “Create Account” and follow the steps to make an iHealth account.
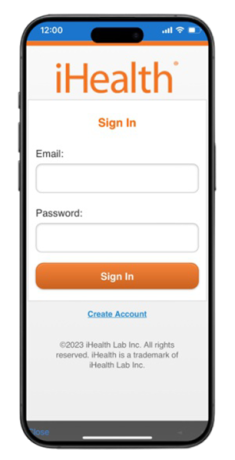
Figure 7. iHealth login screen
- Once you’ve created an iHealth account, you’ll see a screen asking to access your iHealth data. Don’t uncheck any of the boxes. Scroll to the bottom and tap “Link” (see Figure 8).
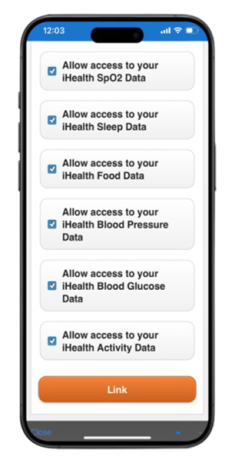
Figure 8. Tap link
- Once you have linked your pulse ox to MSK it will appear in the Remote Monitoring app (see Figure 9). Your iHealth account is now linked with your MSK Remote Monitoring account.

Figure 9. iHealth in your MSK Remote Monitoring app
How to connect your iHealth pulse oximeter to your iHealth account
Before you start, make sure your smartphone or tablet has Bluetooth turned on.
-
Open the iHealth MyVitals app on your smartphone or tablet (see Figure 9).

Figure 10. The iHealth MyVitals app icon
- The app may ask for permission to access Bluetooth. If it does, tap “Allow.” If you don’t allow it to access Bluetooth, the app won’t be able to connect to the iHealth pulse oximeter.
- The app may ask for permission to send you notifications. If it does, you can choose if you want to allow them.
- The app may ask for permission to access other apps on your smartphone or tablet (such as Health). If it does, you can choose if you want to let it.
- If needed, log in using the email and password you used when you made the account (see Figure 11).
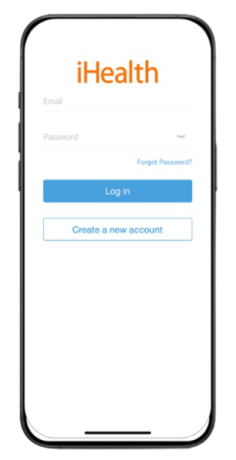
Figure 11. iHealth MyVitals Log in screen
- Select your Region and select “Next” (see Figure 12).

Figure 12. Select region
- Select your Region and select “Next” (see Figure 12).
Figure 12 Select region
- Enter your information and select “Create” (see Figure 13).
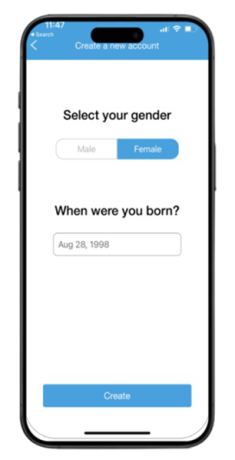
Figure 13. Eneter your information
- Your account has been created. Select “Get Started” to continue (see Figure 14).
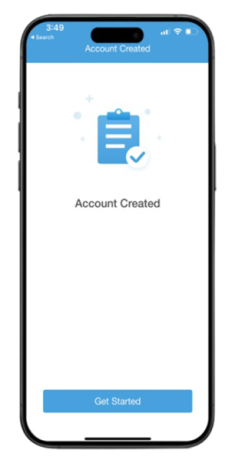
Figure 14. Account created
- You will be asked to connect your Health Kit account to the iHealth MyVitals app. Select “No” (see Figure 15).

Figure 15. Health kit connection
- Click “Select New Device” (see Figure 16).
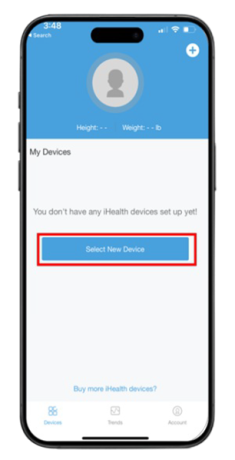
Figure 16. Select new device
- Select “Pulse Oximeters” from the list (see Figure 17).
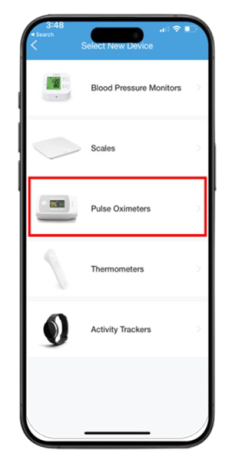
Figure 17. Select pulse oximeters
- Select the “Air” device from the list (see Figure 18).
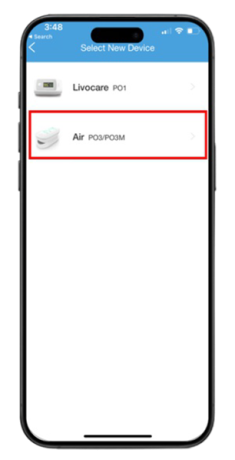
Figure 18. Select the Air device
- Click “Allow” when asked to connect to Bluetooth (see Figure 19).
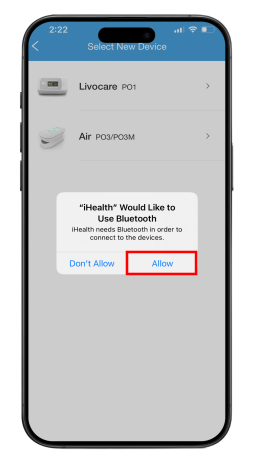
Figure 19. Allow access to Bluetooth
- Connect your iHealth pulse oximeter device to the charger and plug it in. If the display on your iHealth pulse oximeter device is not lit up, press the button to turn it on. Then tap “Next” (see Figure 20.)
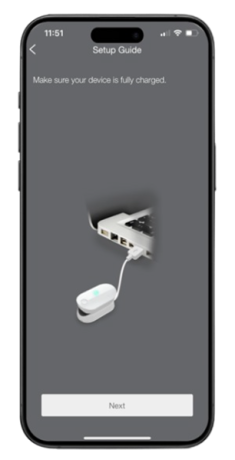
Figure 20. Setup device screen
- A pop-up with your pulse oximeter’s serial number will appear (see Figure 21). Tap the serial number. After a few seconds, it will confirm your iHealth pulse oximeter is connected and ready to use (see Figure 22).
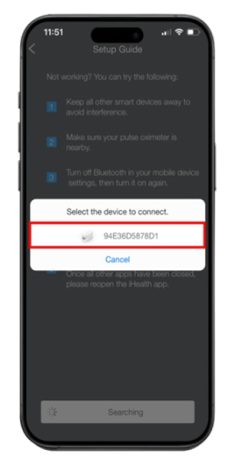
Figure 21. Select device serial number
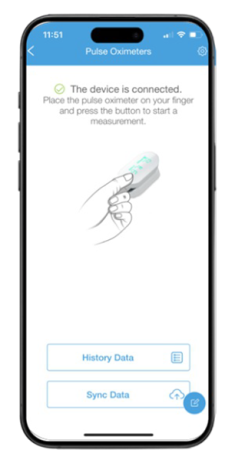
Figure 22. iHealth pulse oximeter connected
How to use your iHealth pulse oximeter
When you use your iHealth pulse oximeter, you’ll use the iHealth MyVitals app. You don’t need to sign into MSK Remote Monitoring app.
For instructions for using your iHealth Pulse Oximeter, read the resource How To Use Your iHealth® Pulse Oximeter.
Contact information
If you need help with your iHealth pulse oximeter, call your care team at MSK.

